Canopy Info
The Mustang II can use either the bubble canopy or a T18 squared off canopy. I chose the T18 canopy for more headroom.
The canopy is large. so do not order unless you are ready to install
or you will need to find a safe place to store it.
A canopy bow is to be
soon available from Mustang Aero or you can get one from Classic Sport
Aircraft (s18thorp@lightspeed.net or call 559-539-2755).
Make sure you check with other builders to see what works and what does not
work....why reinvent the wheel?
I think the goal of every canopy install should be to prevent the following
accident!!
Aircraft: BUSHBY MUSTANG II, registration: N1AZ Injuries: 1 Serious, 1 Minor. DURING A PLEASURE FLIGHT, WHILE FLYING S TURNS AND LAZY EIGHTS, THE CANOPY SUDDENLY SEPARATED FROM THE AIRPLANE. THE AIRPLANE WAS LANDED WITHOUT FURTHER INCIDENT. THE CANOPY WAS NOT RECOVERED. THE REASON FOR THE SEPARATION WAS NOT DETERMINED. Probable Cause: Window, canopy. Separation (Man..those guys at the NTSB are brilliant...you just gotta love them). |
I have heard of a canopy separation that hit the tail causing tail separation then subsequently causing the aircraft to crash....that sucks to put it mildly.
I plan to use the canopy track design from Tony Bingelis's Book "Sportplane Construction Techniques". The canopy tracks look very solid and assist in keeping the canopy attached to the airframe. Get the book from Amazon.com. Tony passed away in 2001 but his books and contributions to EAA leave a great legacy behind.
Actually I did not use the Tony canopy tracks
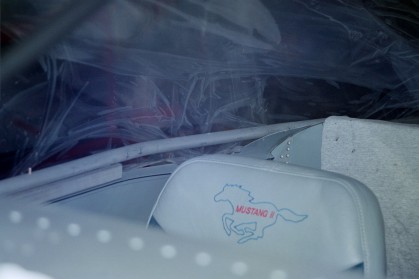
...after building these tracks i found that they were not that great...it was really hard to slide the canopy.....i ended up using some heavy duty drawer slides I found at home depot. They allow the canopy to open 19" and provide support for the sides of the canopy not to be bubbled out in flight. The canopy is secured with three latches. Two hold the canopy down and the third holds it from sliding. Alot to undo in an emergency but able to do it very quickly.
I also keep a hatchet in the canopy to hack my way out. Hopefully I will only need this for cutting firewood when camping and keeping the bears at bay.
How to Install the Canopy
Start with the Windshield
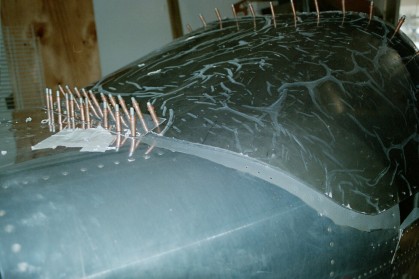
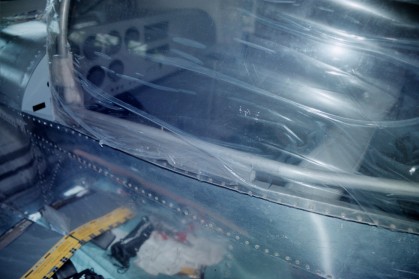
I just trimmed the windshield using a metal cutoff wheel in an air tool i got at a home improvement store for $25. It is like a knife through butter...but crank up the pressure to 100psi. I have a 5hp compressor and this tool really kept the compressor running.
It took me about 3 hours of trimming to get the windshield to fit like a glove. Note that you will cut off alot of the canopy...I did not realize this at first...but i trimmed away about 40% of the Plexiglas that I started with!
I am using a plate on the front of the windshield to hold the windshield in place and clips on the sides and screws through the windshield to the roll bar. Over this i will apply a 5 layer fiberglass lay-up for a nice transition. Note that you can also use a strip of metal here instead of the fiberglass.
I drilled all my holes with 0.5" from the edge of the Plexiglas. Note that holes in the plexiglass are 3/16" and holes in the aluminum are 1/8". The Plexiglas will expand with sun, etc. Needs room to move so it won't crack.
Make sure to polish all trimmed edges so you don't have a starting point for a crack.
This is a photo of the windshield I am using a series of plates to hold the windshield in position and a fiberglass cover over the top.
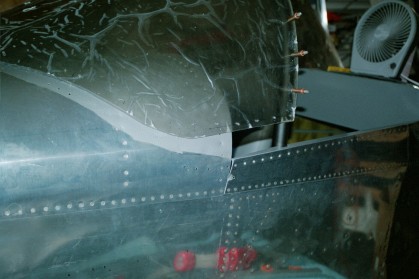
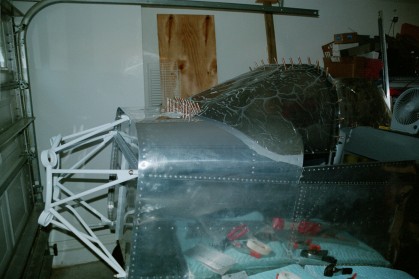
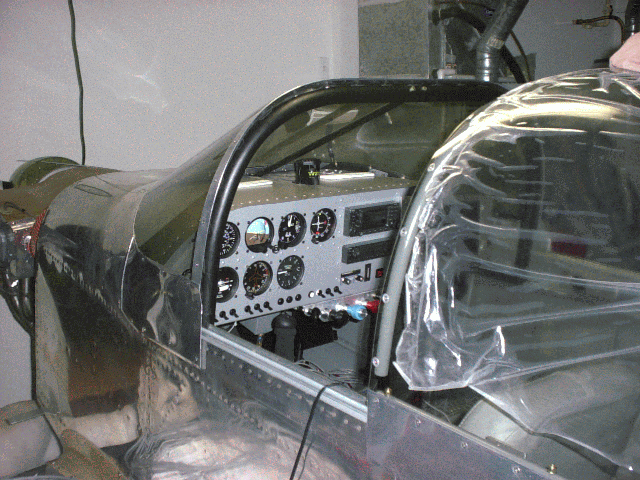
Canopy Frame and Tracks
I used a pair of drawer slides from Home Depot for the canopy tracks. I have two clips inside the canopy that secure the canopy down.
You can see the canopy track in the lower left and the canopy frame is 6061 7/8" tubing bent with a conduit bender ($35 form any home improvement store). And the frame is riveted together.
I made the frame from 7/8" 6061 Aluminum tubing sitting on the canopy tracks. The canopy bow was purchased from classic sport aircraft and was a bit wide so i cut it in the middle and made it slightly narrower.
I bought a conduit bender for the tubing and some conduit to practice with....this was very exciting.....and made my Friday night....i bent a bunch of tubes into weird shapes....I tried to give it to my wife as a sculpture...but she no like...the bender is really easy to use.

Make the frame in 4 sections left, left rear, right, and right rear...once all the pieces are cut you can use inserts and rivets to put it back together.
The canopy is a real challenge to build since you have to get everything to line up smoothly. Take your time and practice drilling on Plexiglas scrap. Cracking a canopy sucks.
3 months for the canopy/windshield install...
Table of Contents
Who am I?
FAQ & Tips
Tools
Corrosion
Protection
Airframe
Construction
Finishing Parts List
First Flight!
Insurance/Other
Costs
Flying & Trips
Video
SIGN Guest Book
VIEW Guest Book